With the DAC Portal, it is possible to streamline the process of managing access to sensitive data, ensuring that researchers have the necessary resources to advance scientific discovery while maintaining the highest standards of data protection and privacy.
We know that, as a new tool, its first use can be complex. For this reason, in this article we will try to show all the elements of interest. Enjoy!
Credentials: who needs to create a new user to access the DAC Portal and who doesn't?
Only new users (since September the 12th) need to create an EGA account to access the DAC Portal.
The EGA team went one step ahead by creating EGA accounts for former DAC members to login to the DAC Portal. These accounts are linked to the personal email used in the DAC structure:
- To check the linked email, DAC members can paste the DAC ID right after this link: https://metadata.ega-archive.org/dacs/ (e.g. https://metadata.ega-archive.org/dacs/EGAC00001002543)
- In case of password oblivion, it is possible to set a new one. All the process is channelled through the personal email.
- Some DAC members may be interested in updating the DAC email. This action can be done contacting our Helpdesk team.
- For the correct functioning of the DAC Portal, users must add the missing information of the DAC Profile.
For a deeper dive, check out our documentation.
The first step: knowing your workspace on the Portal
Once logged in to the platform using the EGA User credentials, note the sections available: DACs and Policies. In the first one it is possible to check all user's registered DACs by default. It provides a comprehensive overview of each DAC, including its EGA accessions (EGAC), title, status, and the number of data access requests associated with each DAC. Whereas the Policies section is where users can manage and view all their registered policies, along with their associated EGA accessions, links, and titles.

A drop-down menu is available with shortcuts to the most useful pages in the top right corner. It is possible to check DACs and policies, as well as creating new ones. In this menu, users can also contact the Helpdesk team using the “Need Help?” section to make inquiries about DACs and policies.
Comprehending the DACs list & making the most of all the features
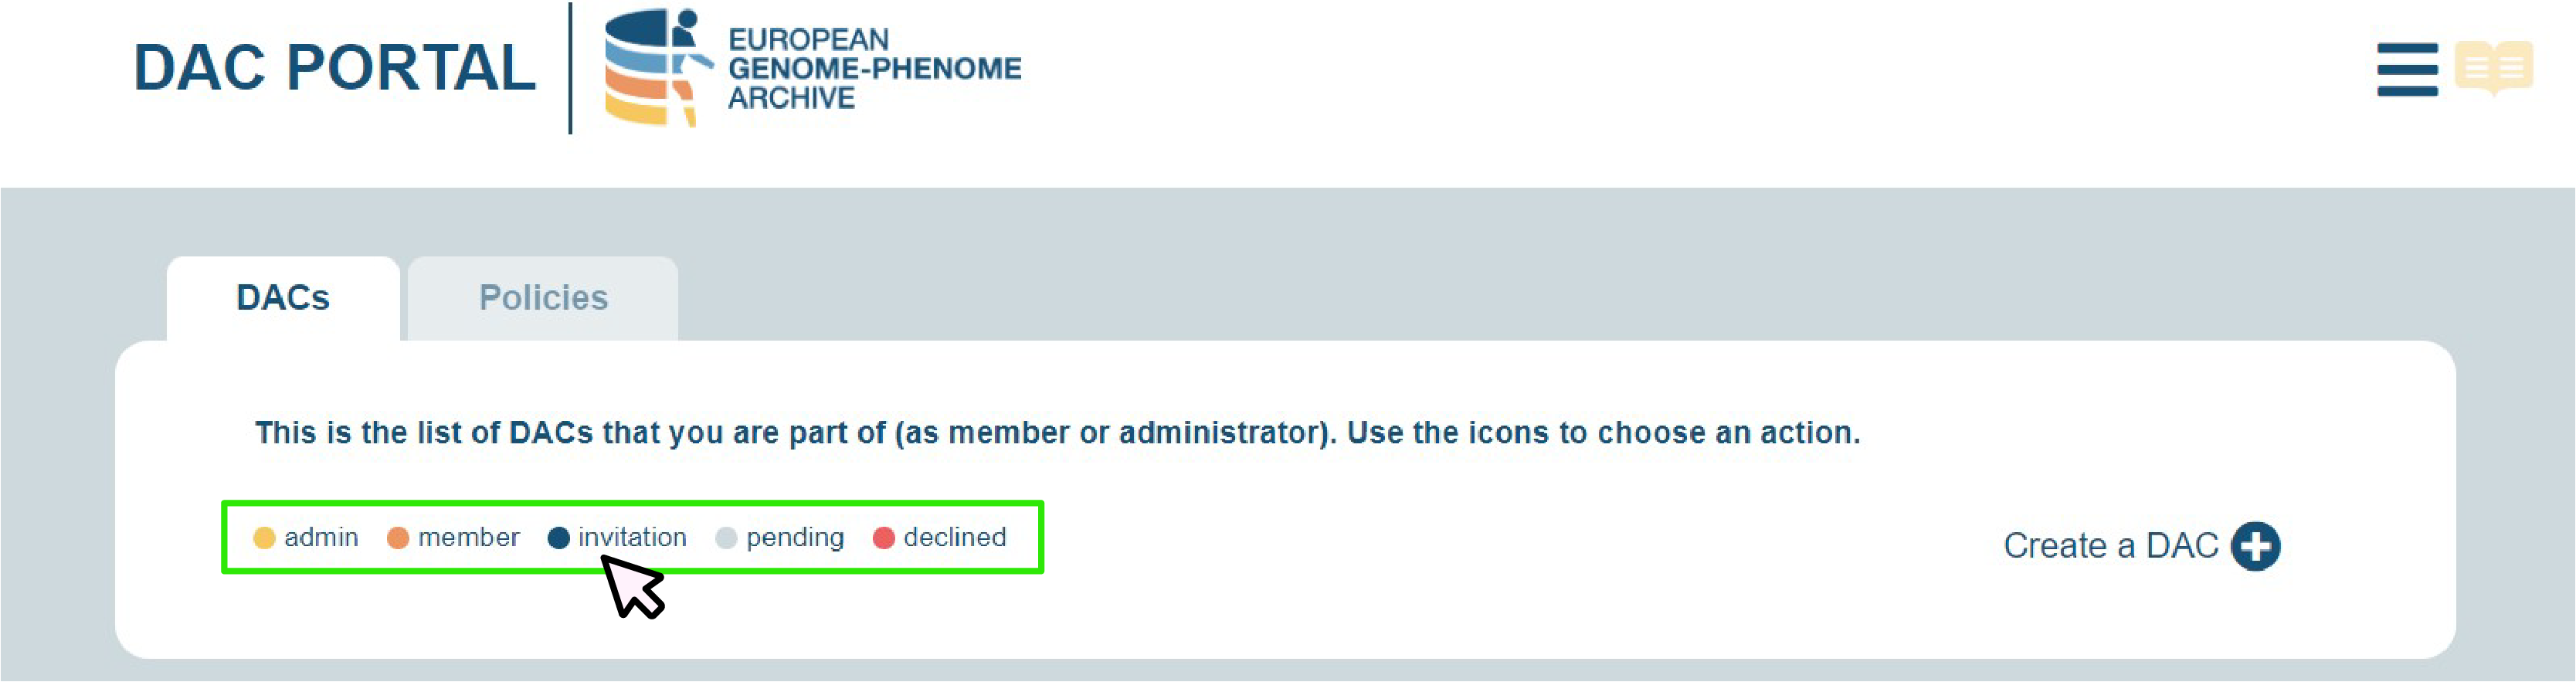
Colours are crucial in the DAC's section as they will indicate the user role and the status in every committee, namely:
- Yellow: you are the administrator of the DAC and have full control to add other contacts, modify the content, and manage data access requests.
- Orange: you are a member of the DAC and have the authority to manage data access requests but cannot make any changes to the content.
- Blue: you have been invited to join the DAC and need to either accept or decline the invitation.
- Grey: the DAC is currently pending validation by the EGA Helpdesk team.
- Red: the DAC has been declined by the EGA Helpdesk team.
Discover more information on how to view the message from Helpdesk containing the declination reason or how to validate or reject a DAC invitation by taking the tour of the DAC Portal.
How to create, register and edit a DAC
Creating a DAC is an easy process that only requires users to complete the necessary information. After that, the EGA Helpdesk team will review the proposal and validate the proposal. Once the DAC is validated it is possible for authorised users with admin role to edit it at any time, ensuring that all information and contacts associated with the committee is accurate and up to date.
Membership management is controlled by searching for the EGA user looking for their username, email, or organisation. Please, note that for a person's details to appear in this search engine, they must have registered as a EGA user.
Data Access Committee administrators manage two types of permissions that apply to contacts: Main contact and Role. Both can be modified at any time:
- Main contact refers to the primary person we firstly contact for any inquiry about the DAC (please, note that we can contact all DAC members, and this refers to the person we will contact first).
- Role defines the actions that can be taken by each contact. There are two possible status, admin and member, details of which can be found in the Take the Tour.
Keep in mind that, to save the modifications, it is always necessary to click on “Update”. Moreover, it is also possible to delete any contact in a DAC whenever it is needed.
The data request process: how to manage access requests
The data request process is now channelled through the EGA website. Once a user sends a request access, the petition will go directly to the DAC Portal profile of the DAC members liked to the requested dataset.
Whenever a request is received, a sand clock symbol will be displayed next to the DAC responsible for the dataset involved. By clicking on the DAC, it is possible to discover more information about requester(s).
In this section, DAC Portal users will also be able to modify the display of the data access requests. It is possible to group requests by dataset accession or username, depending on the user preferences. Additionally, it is possible to isolate specific requests by user or dataset.
To accept a request, users must slide the button to the right. Once the button turns green, it signifies that the request is accepted; the requester will be granted access to the requested dataset. To make lives easier, we have implemented a “Select all” button to easily accept or revoke multiple requests at once.
To decline requests, it is necessary to slide the button to the left. A red button means the requester will not be granted access to the dataset. The DAC Portal will always ask to submit the reason why the data access was denied.
Please, note that any decision, grant or denial, must be confirmed clicking the "Apply" button. This will update the status of the request and notify the requester accordingly.
Taking control of the activity in the DAC Portal: checking the requests history
The History button is a useful feature that allows users to access a list of all the requests that have been granted. This is especially useful for auditing purposes, as it enables to keep track of who has been granted access to the data and when.
To facilitate control for those users with several requests we have included a filtering option. It allows to filter requests by user, mail, dataset, EGA ID, and date (these are combinable to boost the search).
Don't forget about policies: creation, management, and update
Similarly to the DACs section, in the Policies one users can manage and view all their registered policies. By clicking on any policy, it is possible to view its details as well as making any necessary updates or modifications. The sheets symbol and its adjacent number indicate the quantity of objects using a policy. By clicking in the location symbol users will go directly to the DAC page on the DAC Portal to see more information about that DAC.
DAC Portal users can create new policies. The first step requires to link the policy to a registered DAC. After defining the title, users can either add a link to an external URL containing terms & conditions or write the policy content directly on the DAC Portal. Keep in mind that both options can be included.
Data Use Ontology (DUO) codes can be added to new policies. These codes are used to specify the permitted and prohibited uses of the data. Please, note that some of them require a modifier to provide additional specificity. Find out more by checking out this specific content on the DAC Portal Tour. Policies can be modified at any given time by clicking on one registered policy, which will display the current information.